
Excuse me while I blow your mind. That’s how I felt, anyway, when I figured out how to use this new-to-me web tool called Plickers. I was so excited that I started running around my school to show other teachers this AWESOME tool. Plickers is basically a student response system, but I really think that its creators have gone out of their way to make this an ourstanding piece of technology…and it’s free! You’ll need a computer, a smart phone, a set of cards (which you print from the website), and it’s most helpful to have some way to project your computer screen for the students to see.
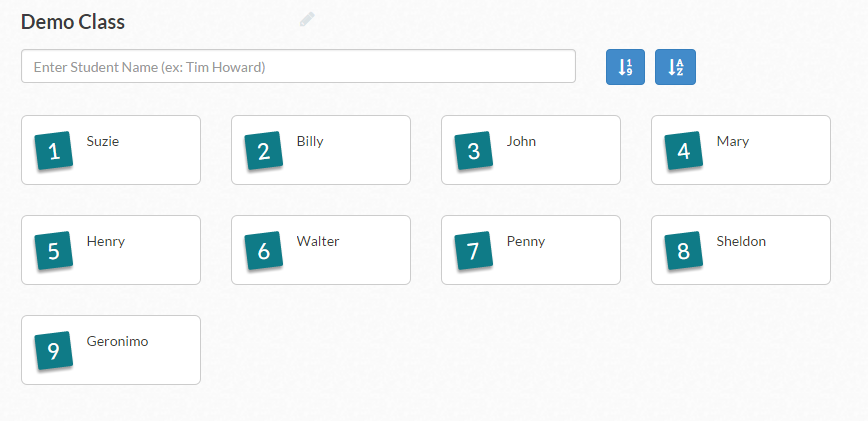
Let’s get you started! First, you’ll want to go to the Plickers website. Create your account, and then create your class. You’ll enter each of your students’ names, and you’ll see that they’re each assigned a number.
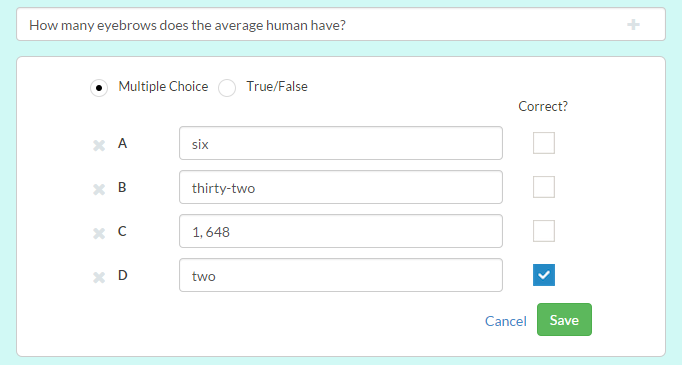
Next, click on the word Library at the top, and then start creating quiz questions. They can be multiple choice or true/false. You can indicate a correct answer, if there is one.
Then, for each of your questions, you’ll click on “add to plan” and assign them to certain classes.
The next step is to print these miraculous cards. They look sort of like QR codes, but you’ll notice that each one is slightly different. To print the cards, click on the “cards” button at the top of the screen. It gives you a variety of printing size options, but I just went with the standard. The site recommends that you print on white card stock for durability, and that you NOT laminate the cards. Standard cards print two to a page, so cut them in half and you’ll have 40 different Plickers cards.
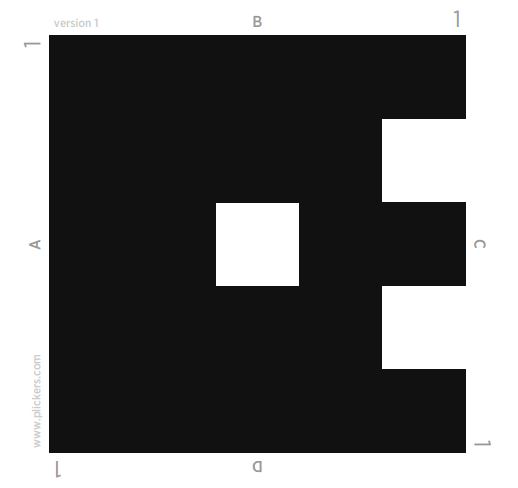
So if you look at the sample Plickers card above, you’ll notice that it has a number 1….that means you give it to student number one from your class. The 4 sides of the shape each have a letter – A, B, C, or D. When you project the question onto the board, students show their answer choice by holding their card – facing toward the teacher – with the letter of their answer choice at the top of the card.
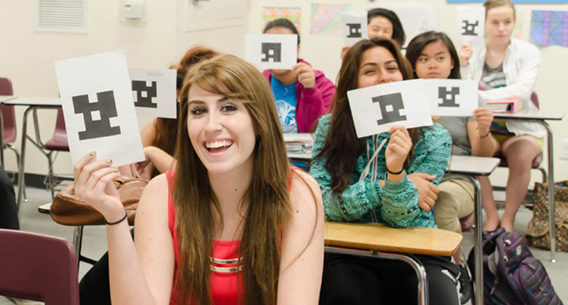
Now for part two…you need the Plickers app for your smart phone. It’s free! It syncs with the program on your computer. When you open the app, you’ll click on your class name and then one of your questions. That question will automatically show on your computer screen & be projected to the board (use the Live View option). As your students hold their cards with answer choices facing you, click on the little camera icon at the bottom of your smart phone screen. It activates the camera, which you then use to SCAN THE ROOM! Yes – I’m so serious! This is mind-blowingly cool! The app honestly picks up each of your students’ answers and immediately imports the data. You can see on your phone and on the screen whose answers have been scanned. If you indicated a correct choice when you created the question, students who get it right will be highlighted green, and red for wrong answers. Is this brilliant technology or what?
I know…I know…you’re going to want to try this right away, and soon you’ll be running down the hallways looking for teachers with whom you can share this exciting Plickers thing, too! But before you go, here are just a few thoughts & other things that I really, really like about Plickers:
- Each card has a “QR code” that looks just a little bit different. Genius! Kids can’t look to see what their neighbor is putting up & just copy the answer. The A, B, C, & D are too little to be seen, and the designs are all different.
- The cards are reusable all year long, and the same set of cards can be used for multiple classes.
- Data is imported immediately and can be viewed in the “Reports” section of the site. You can view that data by student or by question. You have it saved in your Plickers account forever. Instant grading!
- I tried this at home with my son tonight & he wanted to see how far away he could get from my smart phone and still have his answer be ‘readable’. He got about 25 feet away, in low light, and we were both SHOCKED that his card actually scanned!
- I would use this for….quizzes, exit ticket questions, review questions from a lesson taught the day before, informal polls (don’t indicate a correct answer), and I believe this could be used for any & every subject!
- Teachers can immediately make lesson adjustments and informed planning decisions based on the data that is collected.
- Students don’t need any devices. If you’re not a BYOD district, a 1:1 school, or maybe just an elementary school, this is a great way to go high-tech!
- Lastly, before you start Plickering away, below is a great video that I found that demonstrates everything about Plickers step-by-step.
OTHER HELPFUL RESOURCES:
Another EXCELLENT YouTube Tutorial
Third Grade Math Teacher Uses Plickers With Students
Media Specialist Uses Plickers
Students and Teachers Tell Why They Love Plickers


Leave A Comment